You wake up with a stuffy nose. The living room feels dusty an hour after you cleaned. And that faint musty smell in the kitchen just won’t go away. If you are a health-conscious homeowner or renter dealing with allergy symptoms, dust, or strange odors, you already know something is off with your indoor air. But before you rush to buy an air purifier, you need to know what you are actually fighting. Testing your air first saves you money and helps you pick the right machine for the job.
Testing your indoor air before buying an air purifier is the single smartest move you can make. You will identify the specific pollutants causing your symptoms, whether they are dust mites, pet dander, mold spores, or chemical VOCs. This guide walks you through five practical testing methods, from affordable DIY kits to professional assessments, so you can match the right purifier to your actual air quality problems and stop guessing.
Why Testing First Beats Guessing
Indoor air can hold a messy mix of particles and gases. Dust, pollen, mold spores, pet dander, volatile organic compounds (VOCs) from cleaning products or new furniture, and even carbon monoxide can all float around your home. Each one needs a different filter strategy. A HEPA filter, for example, traps solid particles but does nothing for chemical gases. Activated carbon handles odors and VOCs but lets tiny particles slip through.
If you buy a purifier without testing, you might end up with a machine that filters the wrong thing. That is why learning how to test home air quality before you spend a dime is so important. You get a clear picture of what is in your air, and then you can shop for a purifier that actually solves your problem.
The Five Step Process to Test Your Indoor Air
Follow this numbered process to get accurate, useful results. You can do most of it yourself with basic tools.
-
Do a visual and sensory check first. Walk through each room. Look for visible dust buildup on surfaces, dark spots near vents, or condensation on windows. Smell for musty, chemical, or sour odors. Pay attention to when symptoms flare up. Do you sneeze more in the bedroom at night? That points to dust mites or pet dander in bedding. Does the kitchen smell like gas or cleaning products? That suggests VOCs. Write down your observations in a notebook.
-
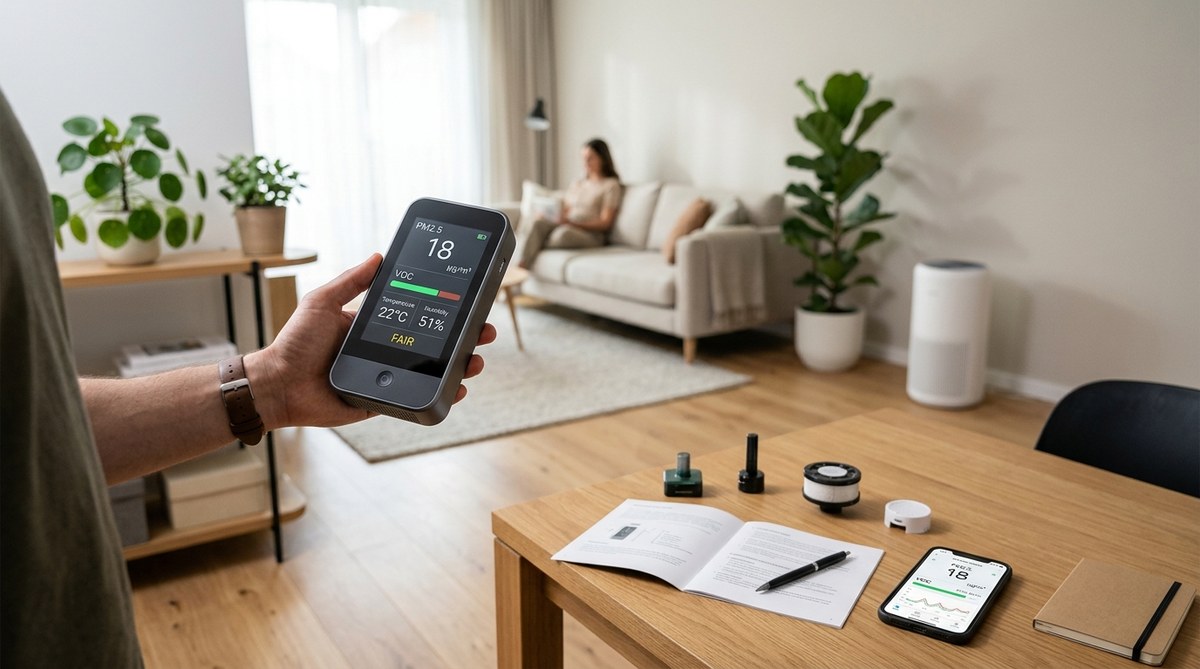
Buy a DIY air quality monitor for real time data. A good consumer grade monitor measures PM2.5 (fine particles), TVOCs (total volatile organic compounds), temperature, and humidity. Place it in the room where you spend the most time. Let it run for 48 to 72 hours. Note the peak readings during cooking, cleaning, or after vacuuming. This gives you a baseline for particle and chemical levels.
-
Use a mold test kit for hidden growth. Mold often grows behind walls, under sinks, or in crawl spaces. A home mold test kit usually includes a petri dish and a swab. You expose the dish to the air for a set time, then send it to a lab. Results take about a week and tell you what type of mold is present and in what concentration. This is especially valuable if you smell mustiness but cannot see visible mold.
-
Check your HVAC filter for clues. Pull out your furnace or AC filter. Hold it up to the light. If it looks clogged with gray or black dust after only a month, you have high particulate levels. If the filter smells sour or musty, you likely have mold or bacteria growing in the ductwork. This simple test costs nothing and reveals a lot about your overall air quality.
-
Consider a professional indoor air quality assessment. If your symptoms are severe or you suspect a serious issue like carbon monoxide or radon, hire a certified professional. They use calibrated instruments to measure gases, particles, and humidity with high accuracy. They can also inspect your home for sources of pollution like gas leaks, water damage, or poor ventilation. Professional tests cost between $300 and $600 but give you a complete diagnosis.
What Each Test Tells You About Your Air
Different tests reveal different problems. The table below breaks down which method matches which pollutant so you can plan your testing strategy.
| Testing Method | What It Detects | Best For | Common Mistake |
|---|---|---|---|
| Visual and sensory check | Visible dust, odors, condensation | Initial clues about mold, dust, or gas leaks | Ignoring low level odors that signal VOCs |
| DIY air quality monitor | PM2.5, TVOCs, humidity, temperature | Real time particle and chemical levels | Placing the monitor near an open window or vent |
| Mold test kit | Mold spores (type and concentration) | Hidden mold growth in damp areas | Exposing the dish in a room with no air movement |
| HVAC filter inspection | Particulate load, mold or bacteria in ducts | Overall system cleanliness | Not checking the filter regularly |
| Professional assessment | Carbon monoxide, radon, VOCs, mold, asbestos | Severe health concerns or complex problems | Skipping this step when symptoms are serious |
Expert advice: “Always test for at least 72 hours with a monitor that logs data. A single reading can be misleading if you just cooked bacon or opened a window. The average over three days tells you the real story of your home’s air quality.” – Dr. Sarah Lin, Indoor Air Quality Researcher at UC Berkeley
Common Mistakes People Make When Testing Air Quality
Even well intentioned homeowners mess up these tests. Avoid these pitfalls to get reliable results.
- Testing only one room. Air quality varies by room. Test the bedroom, living room, and kitchen separately.
- Testing during perfect conditions. Do not test right after a deep clean or when windows have been open all day. You want a normal day that reflects your everyday air.
- Ignoring humidity levels. High humidity above 60 percent encourages mold and dust mites. Low humidity below 30 percent dries out your sinuses. Both affect how you feel.
- Using outdated or expired test kits. Check the expiration date on mold kits and monitor sensors. Old kits give false results.
- Forgetting to calibrate your monitor. Some DIY monitors need a fresh air calibration before first use. Skip this step and your numbers will be off.
Matching Test Results to the Right Air Purifier
Once you know what is in your air, you can choose a purifier that targets those specific pollutants. Here is how to match test results to features.
If your monitor shows high PM2.5 levels, you need a purifier with a true HEPA filter. HEPA captures 99.97 percent of particles down to 0.3 microns. That covers dust, pollen, pet dander, and mold spores. Look for a model with a high CADR (clean air delivery rate) for the room size you tested.
If your test reveals high TVOCs, you need a purifier with a substantial activated carbon filter. Carbon absorbs gases and odors from cooking, paint, cleaning products, and off gassing furniture. Check the carbon filter weight. Heavier filters last longer and work better.
If you found mold spores, choose a purifier with both HEPA and carbon, plus a UV-C light or photocatalytic oxidation feature. UV light can kill mold spores and bacteria, though it works best as a secondary layer after HEPA filtration.
If your HVAC filter was dirty and you have high dust levels, consider a purifier with a pre filter. Pre filters catch larger particles and extend the life of the HEPA filter. This saves you money on replacements.
For a deeper look at matching features to your needs, read our guide on how to choose an air purifier for asthma and allergy relief. It breaks down filter types and room sizing in plain language.
When to Call a Professional
You can handle most basic testing yourself. But some situations call for expert help.
Call a professional if you smell gas, if anyone in your home has persistent headaches or nausea (possible carbon monoxide), or if you live in an area with known radon risk. Also call if you find visible mold covering more than 10 square feet. Mold remediation is not a DIY job at that scale.
Professionals use instruments like photoionization detectors for VOCs and spore traps for mold. They can also test for asbestos if your home was built before 1980. The cost is worth it for peace of mind and accurate data.
How to Use Your Test Results to Improve Air Quality
Testing is only the first step. Once you have your results, take action.
- Control the source. If high VOCs come from a new sofa, air it out in the garage for a week. If dust is from an old carpet, consider replacing it with hardwood or tile.
- Improve ventilation. Open windows for 10 minutes each day, even in winter. Use exhaust fans in the kitchen and bathroom.
- Add an air purifier. Now you know exactly what to filter. Choose a model that matches your main pollutant.
- Maintain your HVAC. Change filters every 90 days (or 30 days if you have pets or allergies). Clean ducts every few years.
- Monitor continuously. Keep your air quality monitor running. It will alert you when levels spike so you can adjust.
If you want to see how different purifiers stack up for your specific situation, check our comparison of top air purifiers for allergies and asthma relief in 2026. It covers models tested for real world performance.
Your Air Quality Testing Action Plan
You do not need to become an air quality scientist. You just need a clear plan.
Start with the sensory walkthrough today. Order a DIY monitor and a mold test kit this week. Run the monitor for three days in your main living area. Check your HVAC filter while you wait for mold results. Once you have all the data, match it to the right purifier features.
Testing your air before buying a purifier is the difference between guessing and knowing. It saves you money, reduces frustration, and most importantly, it helps you breathe easier. Take the first step today. Your lungs will thank you.