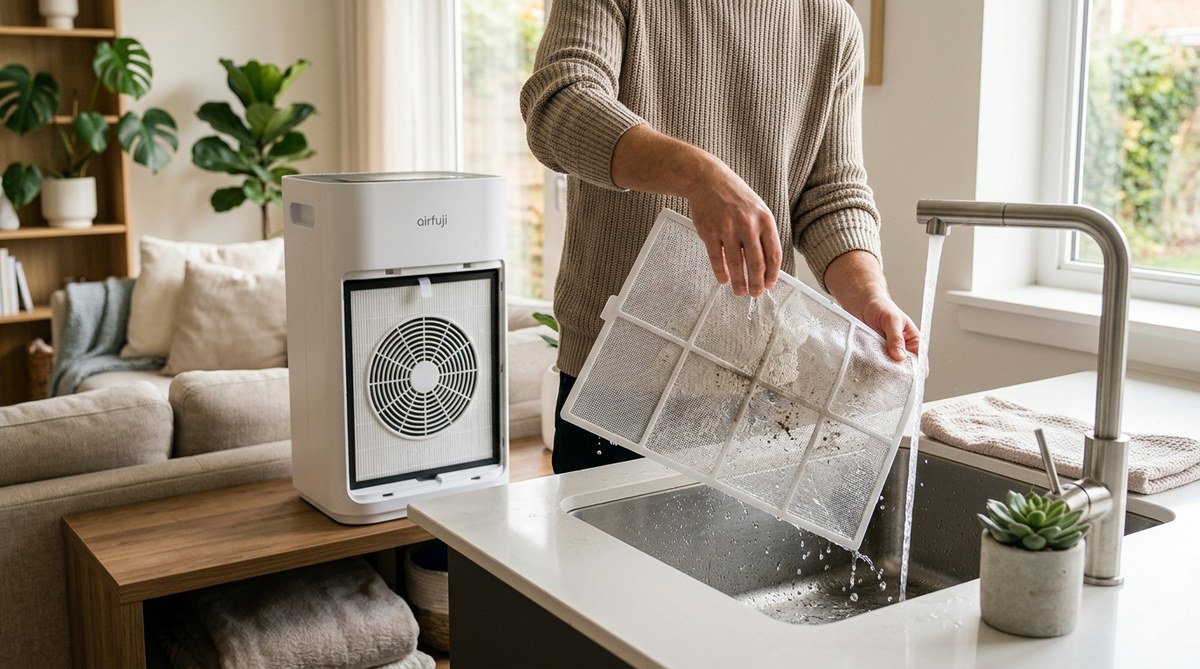
Your air purifier works hard every day to pull dust, pet dander, and pollen out of the air you breathe. But there is one part that takes the brunt of that workload. The pre-filter. It is the first line of defense, and it catches the big stuff so your main HEPA filter does not have to. When that pre-filter gets clogged, your machine struggles. Airflow drops, energy use goes up, and your indoor air quality suffers. The good news is that cleaning it is one of the simplest maintenance tasks you can do. And it makes a huge difference.
Cleaning your air purifier pre-filter every two to four weeks keeps your machine running efficiently, extends the life of your expensive HEPA filter, and improves the air quality in your home. It is a simple, low-cost habit that protects your investment and helps you breathe easier, especially during allergy season or wildfire months in 2026.
What a Pre-Filter Actually Does
Think of the pre-filter as a bouncer at a busy club. It stops the largest particles before they can get inside the main filter area. Household dust, pet fur, lint, and large pollen grains all get trapped here. Without a pre-filter, those particles would land directly on your HEPA filter, clogging it much faster. HEPA filters are not cheap to replace. A good pre-filter saves you money by taking the hit first.
Most modern air purifiers use a washable mesh or foam pre-filter. Some use a disposable fiber layer. Either way, the job is the same. It captures visible debris so the rest of the system can focus on microscopic pollutants like smoke, bacteria, and volatile organic compounds.
Why Cleaning the Pre-Filter Matters More Than You Think
Skipping air purifier pre-filter cleaning for a few months might not seem like a big deal. But the effects add up.
- Reduced airflow: A clogged pre-filter blocks air from moving through the machine. Your purifier has to work harder, which uses more electricity.
- Strain on the motor: When the fan struggles to pull air, the motor can overheat. This shortens the lifespan of your device.
- Dirty air bypass: If the pre-filter is completely blocked, air can find gaps around the edges. That unfiltered air goes right back into your room.
- Faster HEPA filter wear: Every particle that gets past a dirty pre-filter lands on the HEPA filter. That means you replace the expensive filter sooner than necessary.
For anyone dealing with allergies or asthma, a dirty pre-filter means the machine cannot clean the air as fast as it should. That leads to more sneezing, more congestion, and less relief.
How Often Should You Clean It?
The answer depends on your home environment. A good rule of thumb is every two weeks. If you have pets, live on a dusty road, or are dealing with wildfire smoke season, check it weekly. If your home stays fairly clean and you run the purifier on a low setting, once a month is usually enough.
Here is a simple way to tell. Hold the pre-filter up to a light. If you cannot see light through it, it is time to clean it.
Step-by-Step Guide to Air Purifier Pre-Filter Cleaning
Cleaning a washable pre-filter is straightforward. Follow these steps to do it right.
- Turn off and unplug the unit. Safety first. You never want to handle filters while the machine is running.
- Remove the front cover or intake grille. Most models have a simple latch or magnetic panel.
- Take out the pre-filter. It is usually the outermost layer. It may be a foam pad or a mesh screen.
- Vacuum loose debris. Use a soft brush attachment on your vacuum cleaner. Gently remove the surface dust and hair. This step prevents clogs in your sink drain later.
- Rinse with water. Run the pre-filter under lukewarm water. Do not use hot water, as it can warp the material. Use your fingers to gently rub away stubborn dirt.
- Use mild soap if needed. For greasy residue, like smoke or cooking oil, add a drop of dish soap. Rinse thoroughly until no soap remains.
- Shake off excess water. Give the filter a good shake to remove most of the water.
- Let it dry completely. This is the most important step. A wet pre-filter can grow mold or mildew. Place it on a clean towel and let it air dry for at least two to four hours. Do not put it in the dryer or use a hair dryer.
- Reinstall the dry pre-filter. Make sure it is fully dry before putting it back in the machine.
- Replace the cover and plug it in. You are done.
Common Mistakes to Avoid
Even well-meaning owners make errors. Here is a table that shows the right technique versus what to avoid.
| Technique | Right Way | Wrong Way |
|---|---|---|
| Cleaning frequency | Every 2 to 4 weeks | Waiting 6 months or longer |
| Drying method | Air dry fully on a towel | Putting it back while damp |
| Water temperature | Lukewarm only | Hot water or boiling |
| Cleaning tools | Soft brush vacuum, mild soap | Harsh chemicals or bleach |
| Disposable pre-filters | Replace according to manual | Trying to wash and reuse them |
Expert advice: If your pre-filter is disposable, never try to wash it. The paper or fiber material will fall apart. Always check your user manual. Some brands, like those found in guides to choosing the right air purifier, clearly mark which filters are washable and which are not.
What Happens If You Skip Cleaning?
Let us be real. Life gets busy. But ignoring the pre-filter leads to a cascade of problems.
Your air purifier will sound louder. The fan will spin faster to compensate for the blockage. You might notice less air coming out of the vent. Over time, the motor can burn out. A $300 machine can fail because of a $0.00 cleaning step.
For allergy sufferers, the impact is immediate. Dust and pollen that should be trapped recirculate in the room. Your symptoms get worse. You might blame the purifier itself, but the real culprit is a dirty pre-filter.
If you live in an area affected by wildfires, the stakes are even higher. During wildfire season in 2026, fine particulate matter can overwhelm a clogged machine. Cleaning the pre-filter regularly helps your purifier keep up with dangerous smoke levels.
When to Replace Instead of Clean
Not all pre-filters are washable. Some are designed to be thrown away and replaced. How do you tell the difference?
- Washable pre-filters: Made of foam, mesh, or plastic fibers. They feel sturdy and flexible. The manual will say “washable” or “cleanable.”
- Disposable pre-filters: Made of thin paper, non-woven fabric, or fiberglass. They look similar to a furnace filter. The manual will say “replace every 3 to 6 months.”
If you are unsure, look at the product page for your model. Many resources, like those that help you improve indoor air quality, include filter type details.
A disposable pre-filter should be replaced at least every three months. If you have heavy pet traffic or smoke exposure, replace it more often.
How a Clean Pre-Filter Saves You Money
Think about the math. A replacement HEPA filter can cost between $30 and $80. A pre-filter is either free to clean or costs a few dollars to replace. By keeping the pre-filter clean, you extend the life of the HEPA filter by two to three times.
That means fewer trips to the store and more money in your pocket. Plus, your energy bills stay lower because the fan does not have to fight against a wall of dust.
For anyone looking to maximize air purifier effectiveness, this single habit is the most impactful thing you can do.
Matching Your Pre-Filter Routine to Your Home
Your cleaning schedule should reflect your lifestyle.
- Pet owners: Brush your pets outside when possible. Vacuum the pre-filter every week. Pet hair builds up fast.
- Smokers or vapers: The pre-filter will trap sticky tar and residue. Wash it weekly with a bit of dish soap to prevent odor buildup.
- Wildfire zones: During fire season, check the pre-filter every few days. Ash and fine soot clog it rapidly.
- Allergy sufferers: Stick to a bi-weekly schedule during spring and fall. Pollen loads are highest then.
- Basement or garage units: These spaces are dustier. Clean the pre-filter every two weeks without fail.
Tools That Make the Job Easier
You do not need fancy equipment. But a few items help.
- A vacuum with a brush attachment
- A microfiber cloth for wiping the interior of the unit
- A soft bristle toothbrush for stubborn corners
- A clean, lint-free towel for drying
Keep these items near your air purifier. That way, cleaning becomes a two-minute habit instead of a chore you put off.
The Connection Between Pre-Filter Care and Overall Air Quality
Your air purifier is only as good as its maintenance. A clean pre-filter ensures that the air moving through the machine is actually being filtered. If the pre-filter is clogged, the air takes the path of least resistance. That path often bypasses the HEPA filter entirely.
This is why some people complain that their purifier does not work. The machine runs, but the air does not get cleaner. The fix is almost always a clean pre-filter.
For a deeper look at how to keep your whole system running well, check out our guide on common air purifier mistakes. It covers other pitfalls that can ruin performance.
A Simple Maintenance Schedule
Here is a bulleted list to help you stay on track.
- Weekly: Visually inspect the pre-filter. If you see a visible layer of dust, clean it.
- Bi-weekly: Vacuum and rinse washable pre-filters. Replace disposable ones if they look dirty.
- Monthly: Wipe down the exterior and the intake vents of the unit.
- Every 6 months: Check the HEPA filter condition. Replace if necessary.
- Yearly: Deep clean the fan blades and interior if accessible.
Why Your Pre-Filter Deserves More Attention
It is easy to overlook the pre-filter. It is hidden behind a panel. It does not have a fancy sensor that tells you it is dirty. But it is the unsung hero of your air purifier. Treat it well, and your machine will reward you with years of reliable service.
If you are shopping for a new purifier or want to compare models that are easy to maintain, take a look at the best air purifiers for your home in 2026. Many newer designs make pre-filter access and cleaning even simpler.
Making Pre-Filter Cleaning a Habit
Set a recurring reminder on your phone. Pair it with something you already do, like taking out the trash or watering your plants. The process takes less than five minutes of active time. The drying time is passive, so you can do it while you watch a show or cook dinner.
Your lungs will thank you. Your wallet will thank you. And your air purifier will run like new for years. Start your air purifier pre-filter cleaning routine today. Your home deserves it.